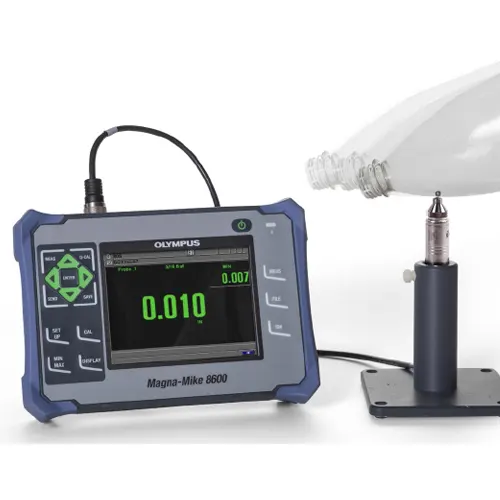
Olympus Magna-Mike 8600 Magnetic Thickness Gage
The Magna-Mike 8600 is a portable thickness gage that uses a simple magnetic method to make reliable and repeatable measurements on nonferrous materials. Operation of the Magna-Mike is very simple. Measurements are made when its magnetic probe is held or scanned on one side of the test material and a small target ball (or disk or wire) is placed on the opposite side or dropped inside a container. The probe’s Hall Effect sensor measures the distance between the probe tip and target ball. The measurements are instantly displayed on the large color thickness display as an easy-to-read digital thickness reading.
Olympus Magna-Mike 8600 Magnetic Thickness Gage Features:
* Three new durable probe designs:
–Straight, Right Angle, and Low-profile Articulating
* Replaceable Wear Caps
–Standard, Chisel tip, and Extended Wear (for 86PR-1 and 86PR-2 only)
* Expanded target selection
–3/16 and 1/4 in. magnetic target balls
–0.045 in. (1.14 mm) 0.026 in. (0.66 mm) diameter wire target
* Expanded thickness range up to 25.4 mm (1.00 in.)
* Larger Color VGA display
* RS-232, USB and VGA outputs
* Fast Measurement update rate 60 Hz
* Expanded alphanumeric data logger
* Save and Recall stored calibration files
* Ability to export file to MicroSD card in .txt and CSV formats
* New accessory kits (Calibration kits)
–Standard up to 9.1 mm (0.360 in.)
–Extended range up to 25.4 mm (1 in.)
–Disk kit
–Wire target kit
–Low-profile probe kit
Three New Probe Designs
The Magna-Mike is available with straight, right angle, and low-profile articulating magnetic probes. The 86PR-1 and 86PR-2 feature replacable wear cap to extend the probe’s durability and reduce replacement costs.
Internal Alphanumeric Data Logger
The Magna-Mike has an extensive file-based alphanumeric data logger that is designed to easily store and transfer thickness readings.
You have the ability to store thickness readings in one of four standard file formats: Incremental, Sequential, Sequential with Custom Point and 2-D Grid.
-Single Send or File Send directly to an Excel spread sheet using WINXL
-Send data to other SPC program
-Both USB and RS-232 outputs
-Export files to a removable MicroSD card in .txt and CSV formats
-Generate on-board reports
Direct Interface to Excel Spread Sheets
The Magna-Mike 8600 has RS-232 and USB outputs that enable the instrument to directly send data to an Excel spread sheet. The included WINXL interface program enables you to single send or file send thickness readings
Applications:
Plastic and Glass Bottles and Packaging
In applications such as plastic containers, simply drop the small target ball inside the container. The magnetic probe held on the outside of the container attracts the target ball. When scanning the probe along the surface or critical corners, the small steel target ball will follow. In the Minimum Mode feature, the gage continually displays both the actual thickness and the lowest thickness reading.
Automotive Tear Seams
The standard probe along with one of the two target disks and a replaceable chisel wear cap makes the Magna-Mike 8600 ideally suited for most automotive tear seam applications where measurements need to made in a thin channel or groove.
Aerospace and Other Applications
The Magna-Mike has been successfully integrated into quality control programs to measure aerospace parts made of composites and nonferrous materials. The wire targets can be inserted into cooling holes in turbine blades and the larger magnetic target balls can be used to measure jet engine parts up to 25.4 mm (1.00 in.) thick.
