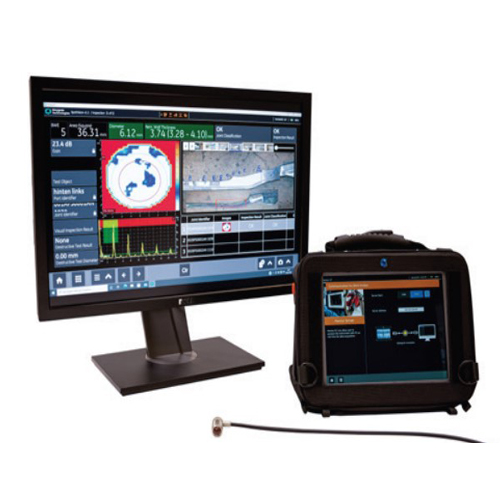
New Waygate Krautkramer SpotVision – Portable PA Ultrasonic Flaw Detector
Waygate Krautkramer SpotVision
Waygate Krautkramer SpotVision developed in collaboration with automotive manufacturers, is fast, easy, and an accurate phased array solution for spot weld inspections. It provides confidence, parts are properly welded. This increases productivity as well as ensures product safety and that quality standards are met at all times.
Waygate Krautkramer SpotVision the solution combines a phased array probe and the Mentor UT phased array flaw detector for comprehensive insights at the highest level. One of the most remarkable features of the newly developed 2D matrix phased array probe is its flexible delay line, filled with liquid. This allows it to adapt to the overall complex geometry of spot welds. The flexible probe also provides optimal acoustic coupling, avoiding false negatives and minimizing process delays.
The 2D matrix probe is combined with Total Focusing Method (TFM) imaging technique. This achieves higher resolution and measurement accuracy than with a comparable phased array. Thanks to TFM, each element is fired individually and sequentially while all elements are listening.
Krautkrämer SpotVision Features:
- A newly developed 2D matrix phased array probe, featuring a flexible probe head for optimal acoustic coupling even on uneven surfaces.
- The 2D matrix is combined with Total Focusing Method imaging, offering higher resolution and measurement accuracy.
- With the Mentor PC Live software, the instrument is connected to a PC, offering an intuitive user interface and simplifying the inspection process so it is faster to set up for your trained personnel and easier to learn for less experienced staff
SPECS :
PA probe 32 elements (6×6 array without corner elements), nominal frequency
13 MHz, flexible delay line to adapt to spot weld surface (weld indentation)
Probe dimensions ø17 x 34 mm (excluding flexible delay line)
Probe cable length 3 m
Inspection area 7.5 x 7.5 mm
Intelligent probes ensure the correct probe is used for inspection and
part and serial number are documented
Inspection Manual
Typical screen refresh rate 10 Hz
Sheet combinations 2T / 3T
Plate thickness range 0.6 – 3.5 mm
Spot weld diameter range 2.0 – 6.0 mm
Material types Mild steel, high strength steel (HSS), dual phase ultra-high strength steel
Contact our Solution Experts for different materials, such as aluminum.
Coatings Bare, zinc coating (galvanized, galvanneal), e-coating, paint
DB Manager Defining inspection plan, analyzing, analytics and archiving.
Import of legacy inspection plans
Image based spot weld diameter reconstruction
Algorithm using TFM and FMC
A-scans per measurement 1024
Reconstruction resolution 0.25 mm
Accuracy ±0.5 mm
Repeatability ±0.5 mm in accordance with VDA5
A-Scan based weld quality identification
Legacy algorithm based on A-Scan evaluation
A-Scan evaluation criteria I
A-Scan evaluation criteria II
A-Scan evaluation criteria IV
SpotVision Base Kit Includes:
- Mentor UT SpotVision Base Kit (Mentor UT, incl. power adapter, Mentor remote battery, communication module, shipping case, probe connector adapter)
- Probe: G13MAPA-32 (SpotVision 2D phased array probe, 32 elements)
- Tyro remote control with 8 buttons
- SpotVision Reference Block (Reference block including 9 different machined nuggets, diameter ranging from ø2.5 to ø6.5 mm)
- Availability: 12 In Stock
